Let’s be honest. Aquarium shops often feel like a robbery. Look at the price tags on filtration gear. You pick up a “premium” sponge filter and see the $40 sticker. You think, “Wait, isn’t this just a block of foam and plastic tubing?”
You are right.
Start a DIY foam filter project. Sure, it saves cash. Getting top-tier filtration for under $20 is a win. But it also lets you know what goes into your tank. Maybe you breed delicate fry that need a gentle current. Perhaps you must manage heavy waste in a shrimp tank. Or maybe you just enjoy the satisfaction of a weekend project. Building your own filter gives you control. Store-bought units cannot match that. The best part? You don’t need an engineering degree. Just take a quick trip to the hardware store. It takes about 20 minutes.
Gather Materials and Tools
Building your own foam filter needs just a few parts. Most are easy to find at hardware stores, aquarium shops, or online. The cost? A fraction of what you’d pay for commercial filters.
Essential Foam Materials
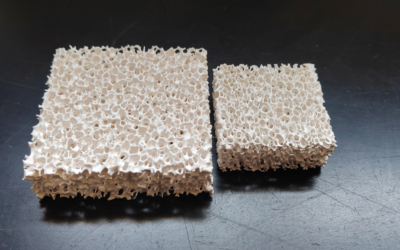
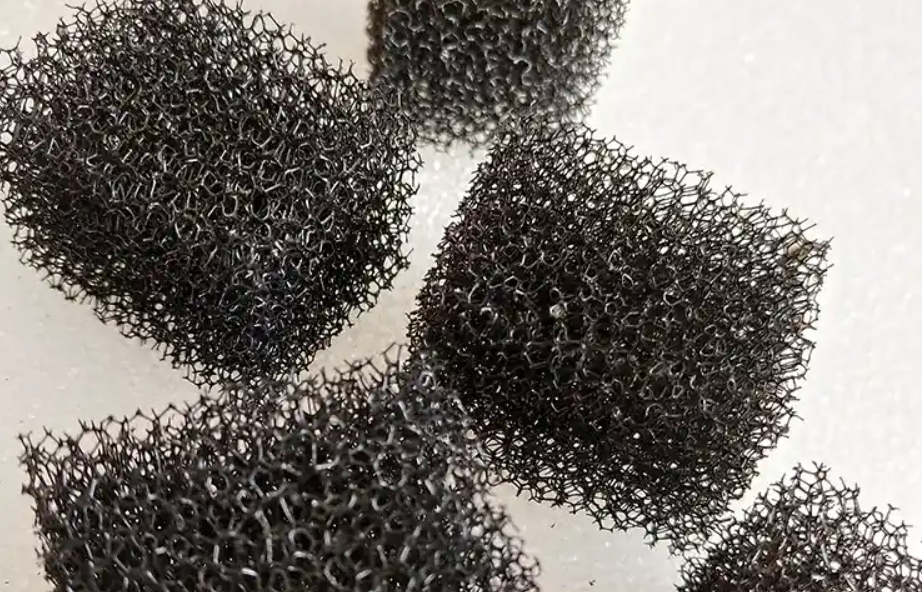
Filter foam is your main filter part. Pick open-cell polyurethane foam with the right pore size (measured in PPI – pores per inch).
For most aquariums, 20-30 PPI foam does great mechanical filtration. It lets enough water through.
Need gentler filtering? Try 40-50 PPI foam. This works well for fry tanks or shrimp breeding. It catches small bits without making strong currents. Delicate fish and shrimp stay stress-free.
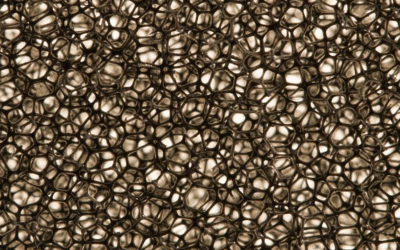
Want maximum biological filtration? Go with coarser 10-20 PPI foam. More surface area means more space for helpful bacteria to grow.
A standard 10-gallon tank needs about 4×4×2 inches of foam. You’ll spend $2-5 per block. Compare that to $15-30 for store-bought options.
Air Supply Components
Your air pump sponge filter needs a good air pump. Match it to your tank size – usually 1-2 watts per gallon works.
You’ll also need:
– Standard airline tubing (¼-inch diameter fits everything)
– A gang valve to adjust airflow
– A check valve to stop water from flowing back during power cuts
Budget $8-15 for a quality air pump. One pump can run several foam filters at once.
Assembly Hardware
Here’s what to gather:
-
Rigid plastic tube (½-inch PVC works great) – this is your center uplift column
-
Waterproof silicone sealant – keeps connections secure
-
Suction cups – mount the filter to your tank
-
Sharp utility knife – cuts foam to size
Want extra filtering power? Stack bio-media foam blocks on top.
Add an air stone inside the uplift tube. This makes finer bubbles and boosts water circulation in your aquarium.
Total hardware cost: $3-6.
The complete setup costs under $20. You get performance that matches $40-60 commercial units.
Cut and Shape the Foam
Cut foam with precision. Right dimensions give you good water flow. Poor cuts create bypass channels that waste your filtration power.
Calculate Your Foam Dimensions
Match foam size to your tank volume. For small home aquariums (10-30 gallons), use foam 1.2-2 inches thick. Larger setups work better with 2-4 stacked foam layers. Make each layer 2-4 inches thick.
Here’s a simple sizing rule: total foam volume should equal 5-10% of your tank’s water volume. Got heavy fish loads or large messy eaters? Increase that to 10-15%.
Real example: Take a standard 15-gallon tank (24×12×14 inches) with a 3-inch back filter chamber. Three foam blocks work well here. Each measures 11 inches high × 3 inches wide × 1.5 inches thick. Total foam volume hits about 0.36 gallons – around 6% of water volume. This suits medium bio-loads.
Need stronger biological filtration? Switch to 11×3×2.5-inch blocks. Foam volume increases to 0.6 gallons (about 10% of tank volume).
Critical clearance tip: Cut foam 1-2mm shorter than your filter chamber on all sides. This 0.5-1mm gap per edge makes installation and removal easy. Too tight? You’ll struggle to fit it. Too loose? Water flows through gaps and skips the foam – your mechanical filtration media does nothing.
For bottom filter compartments, keep foam height 0.5-1 inch below the waterline. This stops edge wear from constant water contact.
Choose Your Shape Strategy
Rectangular blocks waste the least material. You’ll use 85-95% of your foam sheet. They stack well in straight filter chambers. You get maximum aquarium water circulation through predictable flow paths. The downside? Water slows in corners. Small dead zones form and cut effective filtering area to about 80-90%.
Cylindrical foam fits canister filters well. Water flows around the entire surface at an even rate. Compression forces spread out better – your foam lasts longer. But cutting circles from rectangular sheets wastes 25-40% of material.
Need a custom fit? Shaped foam blocks seal gaps in unusual filter chambers. Just know they’re harder to cut by hand with good results.
Master the Cutting Technique
Use a sharp utility knife with a fresh blade. Dull blades tear foam instead of making clean slices.
The golden rule: Never cut through thick foam in one pass. For foam under 2 inches thick, make 2-3 shallow passes. Each cut should go no deeper than one-third the foam thickness.
Mark your cut lines with clear visibility. A permanent marker works great on light-colored foam. Use a metal straightedge or carpenter’s square as a guide for straight cuts.
Cut at a slow and steady pace. Rush the job and you get ragged edges. These reduce surface area for beneficial bacteria to grow. They also look bad in your display tank.
For dense foam (above 30 PPI), consider a fine-tooth foam saw. These tools prevent tearing. Regular knives compress dense bio-media foam blocks instead of cutting through them with clean results.
Install the Air Stone or Tube
Cut rigid PVC tubing to match your foam block height plus 1-2 inches. The extra length sits above the foam top. This helps water move through your tank properly. A ½-inch diameter tube works for most home setups.
Drill 8-12 small holes (2-3mm each) around the bottom inch of the tube. Space them in a spiral pattern. These holes release bubbles if your air stone gets blocked. Your filter keeps working even if you delay cleaning.
Sand the tube edges smooth. Rough spots can rip your foam during setup or when you take it out.
Install the Air Stone
Thread your airline tubing through the uplift tube from top to bottom. Attach a cylindrical air stone at the bottom end. Cylindrical stones push water upward better than disc shapes. This matters for fry tanks that need gentle flow.
Standard 10-20 gallon tanks need 1-2 inch air stones. Larger tanks (30+ gallons) need 2-3 inch stones. This gives you enough water movement.
Secure the connection with a small zip tie or waterproof tape. Loose connections let air stones drop during use. The result? Water flow becomes uneven. This slows down helpful bacteria growth.
Center and Seal the Assembly
Push the tube through your foam block’s center. Make the hole snug but not tight – about 1mm smaller than your tube diameter.
Put a thin ring of aquarium-safe silicone around the tube where it meets the foam bottom. This stops water from going around your foam through the tube gap.
Let silicone cure for 24 hours before use. Wet sealant releases chemicals. These harm fish and helpful bacteria.
Set your filter flow rate after setup. Aim for 3-5 gallons per hour for each gallon of tank volume.
Add Weighted Base
Foam floats. Without weight, your filter rises to the water surface within minutes. This ruins circulation and leaves waste sitting on the bottom.
Calculate the Required Weight
Your foam’s buoyancy depends on its filter foam density (PPI) and size. Coarse 10-20 PPI foam displaces more water than dense 40-50 PPI varieties.
Simple weight formula: For every cubic inch of foam, add 0.3-0.5 ounces of weight. A 4×4×2 inch foam block (32 cubic inches) needs about 10-16 ounces to stay submerged.
Different setups need different weight:
– Gentle filtration fry tank (using 40 PPI foam): Add weight at the lower range (0.3 oz per cubic inch). Dense foam has less buoyancy
– Standard biological filtration foam (20-30 PPI): Use mid-range weight (0.4 oz per cubic inch)
– Coarse bio-media foam blocks (10-20 PPI): Need maximum weight (0.5 oz per cubic inch)
Choose Safe Weight Materials
Stainless steel washers work great. Stack 4-6 large washers and secure them with aquarium-safe silicone. Cost: $2-3 for a pack of 20. These won’t rust or release harmful metals.
Glass marbles offer another option. Fill a small mesh bag with 15-20 marbles and attach it to the foam base. The mesh lets water flow through while adding 8-12 ounces of weight.
Ceramic filter media serves double duty. These porous rings add weight. Plus, they give extra surface area for beneficial bacteria colonization. A 6-ounce bag costs $4-6 and boosts your biological filtration capacity by 20-30%.
Avoid galvanized metal, painted objects, or soft plastics. These materials leach chemicals. They harm fish and disrupt water chemistry.
Secure the Weight
Put silicone on the foam’s bottom center, under your uplift tube. Press weights into the sealant. Create a 2-3 inch diameter weight cluster. This keeps your filter stable. It won’t block aquarium water circulation at the edges.
For larger filters (serving 30+ gallon tanks), spread weight in a ring pattern around the tube base. This stops tilting. Your air pump sponge filter creates strong uplift currents that can tip an unbalanced filter.
Let silicone cure before water testing – 24-48 hours in a well-ventilated area. Half-cured adhesive affects pH levels and stresses fish.
Quick stability test: Fill a bucket with water and submerge your weighted filter. It should sink within 2-3 seconds and stay level on the bottom. Tilts more than 15 degrees? Reposition your weights before final installation.
Connect to Air Pump
Your foam filter sits ready with its weighted base and centered uplift tube. This final step turns it from a stationary block into an active filtration system.
Select Proper Airline Tubing Length
Measure the distance from your tank’s bottom to the air pump location. Add 12-18 extra inches for flexibility. Standard ¼-inch silicone airline tubing handles pressures from most pumps. It won’t kink.
Avoid these common mistakes: Short tubing creates tension. It pulls your filter sideways. It can disconnect during maintenance. Excess tubing (over 6 feet) reduces air pressure by 15-25%. Your air pump sponge filter makes weaker bubbles. Aquarium water circulation slows down.
Clear tubing shows air flow and blockages right away. Black tubing looks cleaner in display tanks. But it hides problems until flow stops.
Attach Airline to Uplift Tube
Push the airline tubing onto the top of your PVC uplift tube. You need 0.5-1 inch of overlap for a tight fit. Loose connections leak air. They make annoying gurgling sounds.
Secure the connection with a small zip tie or tubing clamp. Tighten just enough to prevent slipping. Too much pressure collapses the tubing. This cuts airflow by 30-40%.
Pro tip for multiple filters: Install a T-connector or gang valve near your air pump. One pump can power 2-4 foam filters at once. Each valve controls one filter’s strength. This setup costs $3-5. You won’t need to buy multiple pumps.
Install Check Valve and Airflow Control
Place a check valve in the airline 6-12 inches above your tank’s water level. This one-way valve stops water from flowing back into your pump during power outages. Without it, water damage ruins pumps within hours.
Check valves have arrow markings. These show correct airflow direction. The arrows point away from the pump toward the tank.
Add a gang valve between the pump and check valve for precise control. Start with the valve 50% open. Adjust until you see steady bubble streams rising through your foam. Look for about 1-2 bubbles per second for standard tanks. Too many bubbles create too much turbulence. This stresses fish in gentle filtration fry tank setups.
Connect to Air Pump and Test
Attach the airline’s free end to your air pump outlet. Most pumps have barbed fittings. These grip tubing on their own.
Position the pump above tank level if you can. This prevents water backflow. It works even if check valves fail.
Run the pump for 5 minutes before placing the filter in your tank. This clears manufacturing dust from new tubing. It also tests that all connections hold pressure.
Watch for steady, consistent bubbling. Irregular bursts mean loose connections. They can also mean your pump lacks power. Pump ratings should give 0.5-1 liter per minute airflow for each foam filter. Check specifications before you buy.
Cost summary: Quality airline tubing runs $0.30-0.50 per foot. Check valves cost $2-4 each. Gang valves range from $3-8 based on outlet numbers. Total connection hardware adds just $5-12 to your DIY project. This ensures reliable operation for years.
Position in Aquarium
Corner placement wins over center placement in most cases. Rectangular tanks with standard 3:1 to 2:1 length-to-width ratios create natural water loops. Filters work best along the edges. Water renewal rates hit 70-90% per hour with corner setup. Center placement drops this to 50-60%. Dead zones form in far corners. These account for 20-30% of total water volume.
Corner vs. Center Placement
Watch how particles move. You’ll see the difference right away. A 10-15 gallon tank with corner-placed foam shows visible debris making a full loop in 3-5 minutes. Move that same filter to the center? Remote corners show little movement. Waste settles there. Surface film builds up.
Effective suction radius stretches 4-6 times the foam diameter at normal water depth. Beyond this point, particles depend on overall aquarium water circulation. Direct intake doesn’t reach them. For a 24×12×14 inch tank, keep your filter within 10-11 inches of the farthest corner. You get complete coverage this way.
Golden positioning rule: Place the filter center within 40-45% of tank length from the far corner. A 24-inch tank works best with foam at 8-10 inches from the front glass. Tuck it into the rear corner.
Multiple Filter Configurations
Tanks over 24 inches long benefit from dual foam setups. Place two filters in back corners. Keep them balanced. Split airflow 40-50% to each filter. Leave 40-60% open swimming space in the middle.
This creates horizontal water loops along the front glass. Dead zones shrink to less than 10% of tank volume.
Deep tanks (18+ inches tall) need diagonal placement. Put one air pump sponge filter in the front-left corner. Place the second in the back-right corner. Surface and bottom currents meet. Oxygen spreads throughout the water column.
Heater and Equipment Integration
Put your heater near the foam filter’s uplift column. Rising bubbles create forced mixing. Temperature spreads within minutes.
Practical test results: A 15-gallon tank with corner-placed heater and filter shows 0.3°F maximum temperature difference. Move the heater to the opposite corner? The difference jumps to 1.0-1.5°F.
Mount the heater parallel to the back glass. Set its center 1-2 inches below the foam’s top edge. This spot captures maximum water flow. The bubble stream stays clear.
Hardscape and Decoration Clearance
Large driftwood or rock formations block upward water flow. Objects above or in front of foam reduce bubble height by 20-40%. Mechanical filtration media performance drops at the same rate.
Smart aquascaping approach:
– Filter goes in rear or side corner
– Main hardscape sits in center or opposite corner
– Keep 1.5× foam diameter clearance between decoration base and filter
Dense aquascapes (hardscape covering 50%+ of bottom) hide filters well behind rocks. Keep at least 50% of the intake surface exposed. Leave 2-4 inches of open space in front. This stops ammonia buildup in blocked zones. Your beneficial bacteria colonization needs steady water flow across all foam surfaces.
Small fry tanks with minimal decoration work great with single corner filters. The open layout gives maximum gentle filtration. Baby fish get safe swimming room throughout the entire tank.
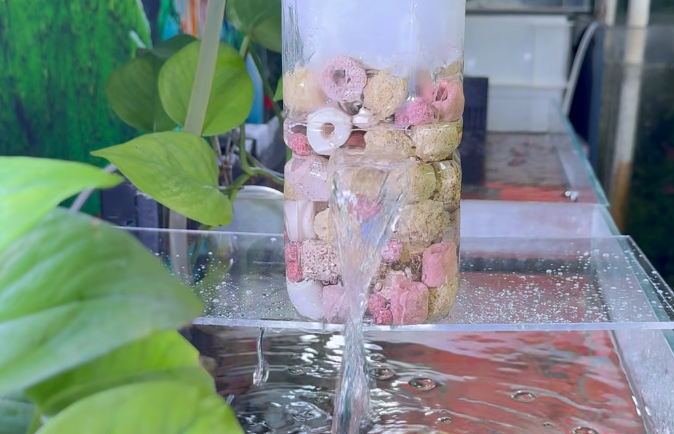
Cycle and Maintain
Your DIY foam filter needs beneficial bacteria colonies throughout the foam structure to work well. This biological filtration process takes time and careful monitoring.
Establish the Nitrogen Cycle Timeline
Complete nitrogen cycling requires 3–6 weeks under good conditions. You can expect closer to 3–4 weeks at water temperature 24–28°C (75–82°F), pH between 6.8–7.8, and high dissolved oxygen levels.
The cycle happens in two clear phases:
Ammonia to nitrite conversion starts 3–10 days after you add an ammonia source. Your test kit shows ammonia dropping while nitrite spikes. This means the first group of beneficial bacteria (Nitrosomonas species) has started living in your biological filtration foam.
Nitrite to nitrate conversion takes another 7–21 days after nitrite peaks. A second bacterial group (Nitrobacter species) converts toxic nitrite into safer nitrate. Your bio-media foam blocks now host complete colonies.
How to confirm cycling is complete:
– Ammonia (NH₃/NH₄⁺) reads 0 mg/L for 3+ consecutive days
– Nitrite (NO₂⁻) stays at 0 mg/L for 3+ consecutive days
– Nitrate (NO₃⁻) shows steady increase to 5–10 mg/L or higher
Never rush this process. Add fish too soon and toxic ammonia burns their gills. Deaths happen within 24–48 hours in severe cases.
Accelerate Beneficial Bacteria Colonization
Fishless cycling (the recommended method) gives you full control:
-
Fill your tank and add dechlorinator
-
Heat water to target temperature (26°C works well)
-
Add pure ammonia to reach 2–4 mg/L concentration
-
Test every 24 hours and maintain ammonia at 1–2 mg/L minimum
-
Ammonia drops from 2–4 mg/L to 0 in under 24 hours AND nitrite stays at 0? Your filter is ready.
Want faster results? Try these proven methods:
Seed your new foam with established mechanical filtration media. Take old filter material equal to 20–50% of your new foam’s volume. Squeeze it near your new foam or attach it there. This cuts cycling time by 30–60%.
Boost dissolved oxygen. Your air pump sponge filter already provides good aeration. Aim for oxygen levels above 6 mg/L. Warmer water holds less oxygen, so increase air pump output at 26–28°C.
Temperature matters a lot. Beneficial bacteria reproduce 40–50% faster at 26–28°C compared to 22–24°C. Don’t exceed 30°C though – this stresses most fish species and some bacteria die off.
Avoid all antibacterial products during cycling. Medications containing formaldehyde, quaternary ammonium compounds, copper, or potassium permanganate kill your developing bacteria colonies fast.
Cycling with fish requires extreme caution. Keep ammonia below 0.2 mg/L and nitrite under 0.1 mg/L at all times. Higher readings demand immediate 50–80% water changes. Stock just 30–50% of your planned fish load at first. Add remaining fish in 2–3 batches spaced 7–10 days apart.
Set Your Foam Filter Maintenance Schedule
Cleaning frequency depends on your biological load. Calculate your stocking density first:
Low bioload: 1 medium fish (5 cm body length) per 40–60 liters. Change 20–30% of water every 2 weeks. Your nitrate stays below 40 mg/L with ease.
Medium bioload: 1 medium fish per 20–30 liters. Change 30–40% of water every 7–10 days. Target nitrate levels under 30–40 mg/L.
High bioload: 1 medium fish per 10–15 liters, or heavy feeding with high-protein foods. Change 30–40% of water every 3–7 days. Monitor nitrate often – readings above 40 mg/L stress fish.
How to clean your foam without crashing the cycle:
Remove the foam and squeeze it 4–6 times in old tank water (saved during water changes). Never use tap water – chlorine kills 60–80% of bacteria in seconds. Never scrub hard – this tears foam structure and removes established colonies.
Dense filter foam density PPI above 40 needs more frequent cleaning. Fine pores clog faster with debris. Check each week and clean once water flow slows down. Coarser 10–20 PPI foam often runs 3–4 weeks between cleanings.
Rotate cleaning schedules if you run multiple filters. Clean just one foam filter per week. The uncleaned filters maintain aquarium water circulation and keep bacteria populations stable during the other filter’s recovery period.
Your gentle filtration fry tank setup requires even more careful maintenance. Baby fish produce less waste but can’t tolerate ammonia spikes. Test water parameters twice each week during the first month. Clean foam just when needed – this means every 10–14 days for tanks with few fry.