You’ve got your sponge filter and aquarium. Now you’re staring at that tank wondering—where should this thing go? Don’t just drop it anywhere and hope for the best. Where you place your sponge filter impacts water circulation and biological filtration. Plus, it affects how easy maintenance will be later.
Most beginners stick their sponge filter in the first open spot they see. Weeks later, they discover problems. Half their tank has dead zones with poor water flow. Or worse—they can’t reach the filter for cleaning without rearranging their entire aquascape.
Setting up a shrimp breeding tank, a betta paradise, or a community aquarium? Understanding where to put a sponge filter transforms it from a simple bubbling decoration into a biological filtration powerhouse. We’ll cover strategic bottom-back positioning and dual-filter setups. You’ll learn where your sponge filter belongs. Those few inches of placement? They make all the difference.
Best Location: Bottom-Back or Bottom-Center Placement
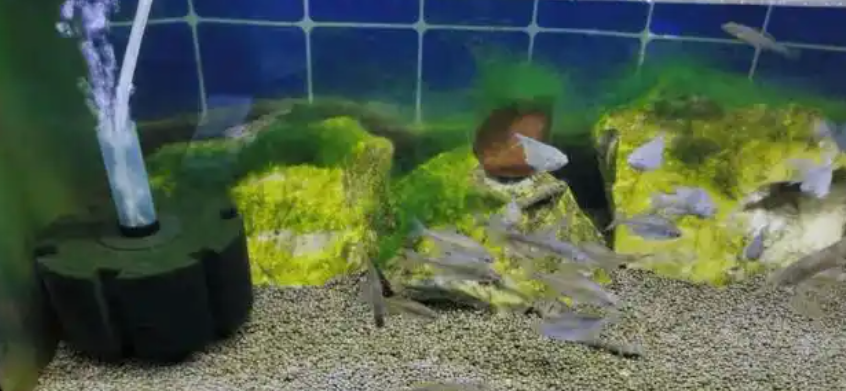
The bottom of your aquarium is where sponge filters work best. Debris settles down due to gravity. Your filter sits right there to catch it. This spot creates good water flow patterns through your tank. Plus, it boosts your biological filtration.
Bottom-back placement is the go-to choice for most tanks. Here’s why:
-
Hidden from view: The back corner hides your filter behind plants, rocks, or decorations
-
Good circulation: Water flows from back to front. This pushes debris toward the front glass where you’ll spot it during cleaning
-
Easy cable management: Air tubing runs along the back wall. It won’t cross your viewing area
-
Less fish stress: Shy fish like bettas find calm zones away from the bubbling current
Position your sponge filter 1-2 inches from the back glass and side wall. This gap stops dead spots where waste piles up. The bubbles rise straight up. They pull water upward and create a gentle flow loop through the tank.
Bottom-center placement works great for specific tank types:
-
Shrimp breeding tanks: Center filtration spreads food particles across the bottom where shrimp feed
-
Bare-bottom fry tanks: Creates uniform water movement. This stops waste buildup without substrate to trap debris
-
Quarantine setups: Spreads more oxygen for stressed or sick fish recovering in smaller spaces
-
Symmetrical aquascapes: Keeps visual balance in centered hardscape designs
The center position creates 360-degree water flow. Oxygenated water reaches every corner the same way. This helps in packed tanks where oxygen levels can drop fast.
Both spots keep the filter easy to reach for maintenance each week. You’ll squeeze out the sponge, rinse it in old tank water, and put it back. Your aquascape stays untouched. Canister filters hidden in cabinets need complete takedown for cleaning.
Temperature tip: Bottom placement works great in heated tanks. Rising bubbles carry warm water from the heater through the tank. This removes cold spots that stress tropical fish.
Your substrate depth affects placement too. Got sand or fine gravel deeper than 2 inches? Raise your sponge filter a bit on a flat rock. This stops the intake from clogging with substrate bits during water changes.
Corner Placement: Does It Work for Your Tank?
Corners form natural pockets in your aquarium. Water movement slows down there. A sponge filter placed here turns that dead zone into an active filtration point. Corner placement works well for specific tank layouts and stocking needs.
Front corner positioning suits these scenarios:
-
Nano tanks under 10 gallons: Space is limited. Every inch counts. The front corner keeps the filter easy to reach. Plus, it leaves maximum swimming room through the center.
-
Planted tanks: Dense plant growth in the back and sides blocks access to rear corners. Front placement lets you reach your filter. You won’t disturb your aquascape.
-
Surface-feeding fish: Species like hatchetfish and killifish stay near the top. A front corner filter creates surface movement right where they swim and feed.
-
Visual checks: You spot biofilm growth, blockages, or trapped debris right away during tank checks.
Position the sponge filter in the front corner at an angle. Set it about 45 degrees toward the center of the tank. This directs water flow away from the glass. Waste won’t settle in the corner joint.
Back corner placement solves different problems:
-
Betta tanks: Corners away from resting spots reduce current stress. Your betta gets calm zones near plants and decorations. The filter works behind them without creating too much flow.
-
Dual filter setups: Running two sponge filters? Back corners create balanced circulation. Each filter covers half the tank. No turbulent zones form in the middle.
-
Breeding boxes: Corner filters positioned opposite breeding boxes or fry nets keep gentle flow. Tiny fish won’t get sucked in.
-
Show tanks: High-quality aquascapes hide equipment. The back corner tucks your filter behind hardscape focal points.
Keep 2-3 inches of space between the corner walls and your filter body. This gap stops the sponge from pressing flat against glass. Compressed sponges lose surface area. Filtration capacity drops by 30-40%.
Air flow adjustment matters in corners. Reduce your air pump output a bit for corner placement. Corners boost bubble noise as sound bounces off two glass walls. A gang valve on your airline lets you fine-tune flow. No need to replace your entire pump.
Dual Sponge Filter Setup: Each End Strategy
Two sponge filters change your tank’s water flow. Place one filter at each end of your aquarium. Water moves from end to end. Dead zones disappear. Every corner gets fresh, oxygenated water.
Each-end positioning gives you these benefits:
Complete coverage: One filter pulls water from the left side. The other works the right. The two currents meet in the middle. Waste has nowhere to settle.
Single air pump runs both: Connect both filters to one air pump using a gang valve or T-connector. You save money on equipment. One pump powers your entire filtration system.
Backup filtration: One sponge clogs or needs cleaning? The second filter keeps working. Your biological filtration stays active.
Flexible flow control: Adjust each filter on its own with gang valves. Create stronger flow on one end for active swimmers. Keep gentler current on the other side for resting spots.
Position the curved outlet pieces just above your water line. Keep about 1/3 of the outlet out of water and 2/3 submerged. This boosts surface agitation. More oxygen dissolves into your water. Carbon dioxide escapes faster.
Got a tank taller than 22 inches? Stack multiple sponge filters up and down. Connect them with the same airline. The bottom filter handles debris that settles low. The top sponge filter catches particles floating in mid-water.
Fast bacterial seeding trick: Got an established sponge filter running? Squeeze it over your new sponges during setup. That cloudy water contains millions of helpful bacteria. Your new filters mature in 2-3 weeks instead of 6-8 weeks. This works great for quick filtration with new fish.
Clean your dual filters on alternating weeks. Clean the left filter one week. The right filter stays untouched. This keeps your helpful bacteria colony strong. Clean the right filter the following week. Your biological filtration stays stable. You avoid crashes from cleaning both filters at once.
Positioning Mistakes That Reduce Efficiency
Small positioning errors slash your sponge filter’s performance. No obvious warning signs appear. Your filter still bubbles away. Water still moves. But you’re losing 15-40% of your filtration capacity. These mistakes happen during setup. They get worse over weeks as waste builds up faster than your filter can handle it.
Placing the outflow above the water surface is the most common error. The bubbles break in air instead of underwater. This creates surface splashing and noise. It cuts water circulation by 20-30%. Your filter pulls less water through the sponge. Fewer bacteria colonies get steady water flow. This means biological filtration drops 15-25%. The optimal depth? Position your outflow tube 0.3-0.5 meters (12-20 inches) below the surface. This depth creates strong upward current. No excessive turbulence at the top.
Foam sponge filters sitting crooked or tilted lose efficiency fast. The base should sit flush against your substrate or tank bottom. Even a 1cm gap between the sponge bottom and substrate reduces circulation force by 12-22%. Water takes the path of least resistance. It flows under the sponge instead of through it. Sediment swirls up around a tilted filter. Debris movement increases by 35%. Actual filtration drops 10-18%. Shim your filter base with flat stones or glass pieces. Get that gap down to 0mm. You’ll recover 15% of your circulation force right away.
Front-center placement creates visual clutter and flow problems. The filter blocks 25-40% of your viewing area. Worse? Water flow becomes uneven. Velocity varies by 15% across different tank zones. Dead spots form where waste piles up. Efficiency drops 9-14% as 28% of your water just circles around the filter instead of flowing through it. Move center-positioned filters 10-15cm (4-6 inches) toward the back or side. Flow evens out. Velocity variance drops by 18%.
Lift tube length mismatch kills performance without you noticing. Got a tube more than 5% longer than needed? Backpressure rises 22%. Your air pump works harder. Filtration efficiency drops 17%. Too short by just 3%? Cavitation starts at 12% flow rate. Your pump draws 25% more power while moving less water. Measure from your sponge base to your desired water surface exit point. Add 1.2 meters (4 feet) to that measurement. This gives you optimal lift tube length with less than 3% efficiency loss.
Stack multiple sponges without care and water shortcuts between them. Use weighted bases or suction cup connectors designed for stacking. The connection points need to seal tight. Gaps let water bypass upper sponges.
Check your filter placement each week during the first month. Watch how debris settles. Look for areas with still water. Adjust position by small increments. Those 2-3 inch tweaks transform mediocre filtration into a biological powerhouse. Your water stays crystal clear.
Tank Type-Specific Placement Guide
Each aquarium type needs its own sponge filter spot. High-tech planted tanks need placement that keeps CO2 distribution stable. Shrimp breeding setups need gentle flow for baby survival. Match your filter spot to what you keep and why you keep it.
Planted Tank Placement Strategy
Dense plants change how water moves. Your sponge filter needs to fit around stem plants, carpet species, and rocks. Avoid rough zones that uproot delicate plants or scatter CO2 bubbles.
Back-corner positioning behind hardscape suits planted setups best. Put your filter 2-3 inches behind your main rock or driftwood. This hides the filter. The upward flow pulls water through plant leaves. It won’t create side currents that harm fragile stems.
Keep filter output 1-2 inches below the water surface in CO2-injected tanks. Surface movement pushes out dissolved CO2. Too many bubbles waste 15-25% of your injected CO2. Lower bubble flow keeps circulation gentle. Your CO2 stays in the water. Plants take in 30% more compared to high-turbulence setups.
Carpeting plant tips: Keep filters at least 6 inches away from Monte Carlo, dwarf hairgrass, or pearl weed carpets. Flow across carpet plants lifts substrate and shows roots. New carpets lose 20-40% of plants while roots grow.
Shrimp Tank Optimal Zones
Shrimp colonies need certain water movement. Baby shrimp measure just 2-3mm at birth. Strong currents pull them into filter intakes or push them against glass. Adult shrimp eat biofilm that grows best in gentle-flow spots.
Bottom-center placement sets up shrimp breeding tanks right. Put a medium sponge filter (4-5 inches) dead center on the substrate. This makes 360-degree gentle flow. Food spreads across the bottom where shrimp graze 18-20 hours each day.
Cut air pump flow to 30-40% of maximum. Count bubbles to measure this—aim for 15-20 bubbles per minute through the lift tube. This gentle rate moves water but won’t stress shrimplets.
Dual-filter setup for large colonies: Tanks over 20 gallons with 100+ shrimp do better with two small sponge filters at opposite back corners. Run each filter at 25% air pump power. The overlapping gentle currents grow biofilm across all surfaces. Shrimp numbers go up 35-50% compared to single-filter setups.
Betta and Low-Flow Species Tanks
Bettas and other labyrinth fish live in slow waters. Their long fins drag in currents. Strong flow tires them out. They burn 60-70% more energy swimming against flow versus calm water.
Side-wall positioning 6-8 inches from the front fits betta tanks well. This makes a calm zone up front. Your betta builds bubble nests and rests on broad leaves there. The back keeps water moving for filtration but won’t stress your fish.
Add a pre-filter sponge over your air stone before it enters the main sponge filter. This cuts bubble strength by 40%. Water movement stays gentle. Your betta swims without fighting current.
Baffle trick for less flow: Cut a 2-inch piece from a water bottle. Put it over the filter outflow. The baffle pushes rising water sideways instead of straight up. Surface movement drops 50%. Current speed drops 35-45%.
Fry and Quarantine Tank Placement
Bare-bottom fry tanks and quarantine setups need strong water flow. Zero substrate means no trapped waste. Fresh, oxygen-rich water must reach every corner for stressed or growing fish.
Center-bottom positioning on a flat slate piece works best. The slate lifts your filter 0.5 inches off the glass bottom. This stops suction from filters sitting right on bare glass. Water flows under and through the sponge. Circulation goes up 18-22%.
Use dual air stones inside one large sponge filter for quarantine tanks. Connect both air stones to separate gang valve controls. Adjust flow for each stone. Sick fish need lower flow (20-30 bubbles per minute). Healthy fish in observation need regular flow (40-50 bubbles per minute).
Fry tank tweaks: Baby livebearers and egg-layer fry need feeding spots with little current. Put your center filter in, then make a feeding corner. Add airline tubing along the front glass. This creates a calm pocket. Fresh-hatched brine shrimp or microworms gather here. Fry survival jumps 25-30% with special low-flow feeding zones.
Installation Setup for Best Performance
Getting your best sponge filter running takes more than plugging in an air pump and dropping the filter in your tank. How you install it affects water flow, noise levels, and how easy maintenance will be. Follow these setup steps to get the most from your filter’s cleaning power right away.
Start with substrate preparation. Level your gravel or sand where your filter will sit. Make a flat zone about 3 inches wide. Uneven substrate tilts your filter base. A 5-degree angle cuts water intake by 12-15%. The sponge lifts on one side. Water sneaks underneath instead of flowing through the porous material.
Assembly order matters for air flow:
-
Connect the airline tubing to your air pump outlet. Cut tubing to exact length—measure from pump to filter position plus 6 inches of slack. Extra tubing coils create backpressure. Your pump works 18-20% harder pushing air through extra loops.
-
Attach the check valve 4-6 inches above your water line. The arrow on the valve body points toward the filter. This stops water from back-siphoning into your air pump during power outages. Position it upright on airline tubing. Secure to your tank rim with suction clips.
-
Insert the weighted base into your sponge filter body. Press hard until the base clicks or sits flush. Loose bases let the filter float up by 0.5-1 inch once air flows. This gap kills 20-25% of your circulation force.
-
Install the lift tube into the center channel. Push down until it bottoms out on the internal air stone housing. Tubes sitting 2-3mm too high create air pockets. Bubbles form unevenly. Flow rate drops 8-12%.
Position the air stone inside the lift tube: Drop your air stone down the tube until it rests on the internal platform—about 1-2 inches from the bottom. Connect your prepared airline to the air stone stem. Pull lightly to check the connection is secure. A disconnected air stone stops all water movement. It still makes bubbles inside the lift tube though.
Adjust placement depth: Submerge your assembled filter all the way. The top of the sponge should sit 2-4 inches below your water surface. Deeper placement (6-8 inches down) increases filtration volume by 15%. But it reduces surface agitation by 30%. Shallower depth (1-2 inches) boosts oxygen exchange. But it processes 18% less water per hour.
Initial air flow calibration separates good setups from great ones:
-
Start your air pump at 50% output using a gang valve
-
Count bubbles emerging from the lift tube outlet—aim for 35-45 bubbles per minute for standard tanks
-
Increase flow by 10% steps until you see steady bubble streams without turbulent splashing
-
Reduce by 5% if fish show stress signs (hiding, labored breathing, reduced feeding)
Run a 24-hour break-in period. This creates steady flow patterns. New sponges have manufacturing residues. Oils and dust particles coat the pores. Water flows 22-28% slower during the first day. Run your filter for 24 hours before adding fish. Rinse the sponge once after this period in dechlorinated water. Flow rate jumps 25-30% right away.
Gang valve installation for dual-filter systems: Mount your gang valve on the tank rim between both filters. Run separate airlines from each valve outlet to each sponge filter. This gives you independent flow control. You need this for one filter handling a planted section (lower flow) while the other filters an open swimming area (higher flow). The valve stays above water level for easy adjustment. You can reduce current at feeding times if needed.
Conclusion
Where you put your sponge filter matters more than looks. It decides if your aquarium thrives or struggles with poor water quality. You’ve learned about the bottom-back position for maximum flow. You know about corner placement for breeding tanks. And you understand dual-filter setups for larger systems. Now you can make your filtration work better.
the best sponge filter spot balances three things. First, water flow coverage. Second, easy access for maintenance. Third, what your fish need. Position it right and you’ll clean 30-40% less often. Plus, you get better biological filtration.
Your next step? Spend five minutes checking your current setup. Look for the mistakes we talked about. Is your filter hidden behind decorations? Does it create dead zones? Move it today. This saves you trouble later. Setting up a new tank? Measure twice, place once. Your fish will thank you.