Your sponge filter works overtime behind the scenes. Neglect it too long? You’ll face cloudy water, struggling fish, and a biological breakdown. Recovery takes weeks.
Clean it too hard or too often? You’ll destroy the bacteria colonies keeping your aquarium healthy. Crystal-clear water versus an ammonia spike comes down to one thing: knowing when and how to maintain this essential equipment.
Running a breeding tank, planted aquarium, or simple betta setup? The cleaning frequency varies based on factors most fishkeepers overlook.
How Often to Clean Your Sponge Filter
Most sponge filters need cleaning every 2 weeks. This works for typical home tanks with a moderate number of fish and regular feeding.
But it’s not that simple.
Heavy-load tanks need cleaning each week. Fry-raising tanks get dirty fast. So do overcrowded tanks. Tanks with heavy feeding schedules also clog filters quickly. All that extra waste pushes your filter to its limits. Flow drops within days in extreme cases.
Light-stocked tanks? Clean every 2-4 months. A single betta in a planted 10-gallon tank makes little waste. The good bacteria stay healthy. The sponge keeps flowing without help each week.
Your Filter’s Warning Signs
Weak bubble flow means clean now. Air bubbles slow down from their normal stream? Water flow gets weaker? Your filter is badly clogged. Clean it today.
Watch for these visual signs:
– Heavy debris coating the sponge surface
– Brown or murky color throughout the material
– Bits of matter trapped in the pores
– Bad smells coming from the tank
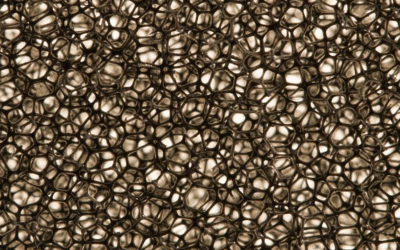
Here’s what matters most: A brown, dirty sponge doesn’t always need cleaning. Mature filters grow thick biofilm layers. They look gross but hold tons of good bacteria. Focus on performance, not looks. Water still flows strong through that grimy sponge? Leave those good bacteria alone.
Chemical problems need fast action. Your water test shows ammonia or nitrite spikes? Your biological filter has stopped working. Cloudy water that won’t clear despite regular care points to the same issue.
Cleaning Schedule for Different Tank Types
Each aquarium creates its own waste load. Your sponge filter cleaning schedule needs to match what your tank produces.
Packed Community Tanks
Clean every 7-10 days in tanks full of fish. A 20-gallon tank with 15+ active fish creates constant waste. Cichlid tanks need this schedule too. These aggressive eaters produce huge amounts of waste that clog sponges fast.
Flow starts dropping in the first week. Debris builds up on the sponge surface. Food bits, fish waste, and plant pieces fill the foam pores. Don’t wait for total blockage. Less flow means your helpful bacteria can’t get enough oxygen.
Breeding and Fry Tanks
Clean every week in breeding setups. Baby fish need clean water. Their small bodies make lots of waste for their size. Plus, you’re feeding them several times each day to help them grow.
Fry tanks have a special problem: extra food. Crushed flakes and powdered food that babies don’t eat sink into your sponge filter. This breaks down fast. It creates ammonia spikes that can kill delicate fry in hours.
Check your sponge filter every 3-4 days. Look at it to see if it’s dirty. Squeeze it in a bucket of tank water if flow drops at all. The bacteria bounce back fast in these food-rich setups.
Planted Tanks with Few Fish
Every 6-8 weeks works well for planted tanks with light stocking. A single betta or 6 neon tetras in a planted 15-gallon tank puts little stress on your filter.
Plants eat nitrates all the time. This cuts down on nutrients in the water. The sponge filter keeps water clear without much help. See that brown coating on your sponge? That’s mature biofilm. Leave it there. Millions of helpful bacteria live in this coating. They keep your water safe and stable.
Clean only when flow drops or debris blocks the surface. Some planted tank owners go 3-4 months between cleanings with no problems.
Shrimp Tanks
Clean every 2-3 months minimum. Shrimp make very little waste compared to fish. A group of 20 cherry shrimp in a 10-gallon tank creates almost no impact on water quality. They also clean up leftover food before it gets to your filter.
The tricky part? Shrimp react badly to water changes. Clean the sponge filter step by step. Take out and rinse half the sponge material. Leave the other half alone. This keeps your bacteria alive and working.
Key Factors That Change How Often You Should Clean
Tank conditions change. Fish populations grow. Feeding amounts change. Equipment ages. These variables impact how fast your sponge filter clogs and how often you need to maintain it.
Fish Population Density
More fish means more waste. Simple math: Double your fish count, and you’ll double the organic matter hitting your filter. A tank with 5 goldfish produces different waste loads than the same tank with 20 neon tetras.
Large fish create bigger problems. One 6-inch Oscar generates more waste than fifteen small guppies combined. Measure your bioload. Count every fish. Factor in their adult sizes, not their current baby dimensions.
Overstocked tanks need weekly cleanings minimum. The sponge can’t process everything thrown at it. Debris piles up in layers. Flow drops within days instead of weeks.
Feeding Frequency and Amount
Overfeeding kills filters faster than anything else. Uneaten food sinks into sponge pores. It breaks down into ammonia. It feeds algae blooms. It creates the brown sludge coating your filter surface.
Track your feeding habits for one week. Most fishkeepers feed 60% more than necessary without realizing it. That extra food doesn’t disappear. Your sponge filter catches and processes every flake.
Tanks with multiple feedings per day need cleaning every 7-10 days. Breeding setups where you feed 3-4 times per day? Check that sponge every few days. Single feeding per day in a light-stocked tank? You can stretch cleanings to 3-4 weeks.
Tank Age and Biological Maturity
New tanks need gentler, less frequent cleaning. Your helpful bacteria colonies are still building during the first 2-3 months. Aggressive cleaning during this period destroys the bacterial base you’re trying to build.
Clean new tank sponges only when flow drops. This might mean 4-6 weeks between cleanings at first. Yes, the sponge looks dirty. Leave it alone. Those brown patches are bacterial colonies forming.
Mature tanks run on stable schedules. After 6+ months, your bacteria populations reach balance. The filter processes waste well. You can set up a predictable maintenance routine based on your specific conditions.
Established foam filters clean themselves part-way through bacterial action. The biofilm breaks down some organic matter before you ever touch the sponge.
Water Parameters and Chemistry
Hard water creates mineral deposits that clog sponges in a different way than soft water. Calcium and magnesium build up inside foam pores. This reduces flow even when biological waste seems minimal.
Test your water hardness. Readings above 200 ppm mean you’ll need to clean 20-30% more often than standard schedules suggest. The minerals don’t rinse away well. They require physical squeezing to remove.
pH swings affect bacterial performance. Unstable pH levels (moving more than 0.3 points per day) stress your helpful bacteria. They process waste slower. Organic matter piles up faster. You’ll need more frequent cleanings to make up for it.
Step-by-Step Proper Cleaning Method to Preserve Bacteria
One wrong move during cleaning wipes out months of bacterial buildup. Your fish depend on those tiny workers living in your sponge filter. Here’s how to clean without destroying them.
Gather Your Materials First
You need a bucket or container that holds at least 1-2 gallons of water. This bucket becomes your cleaning station.
Fill it with water from your aquarium. Scoop from the tank during your regular water change. Never use tap water. Chlorine in tap water kills beneficial bacteria on contact. “Dechlorinated” tap water still causes problems. The temperature difference and pH shift will damage bacterial colonies.
Keep these items ready:
– Clean bucket filled with tank water
– Second container for rinsing (also with tank water)
– Towel for drips
– Timer or clock to track duration
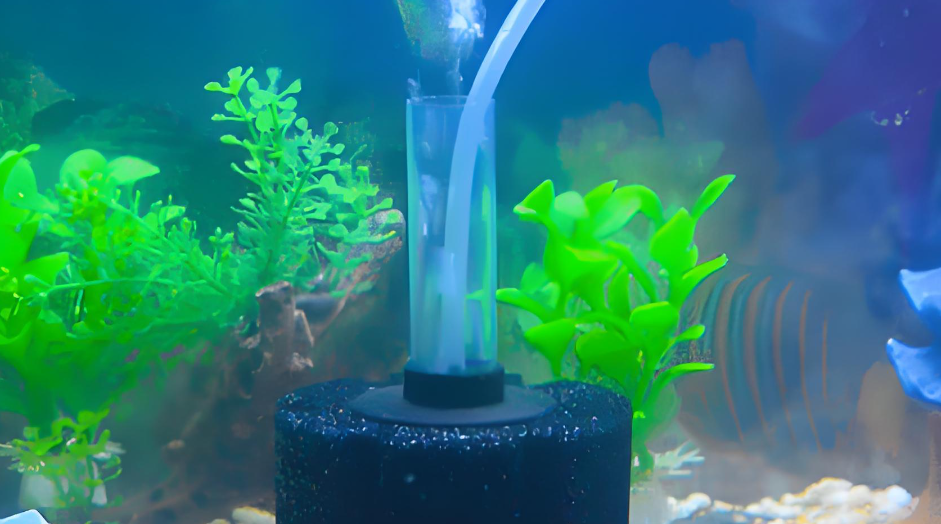
Remove the Sponge Filter with Care
Turn off your air pump before touching anything. This stops debris from shooting through your tank.
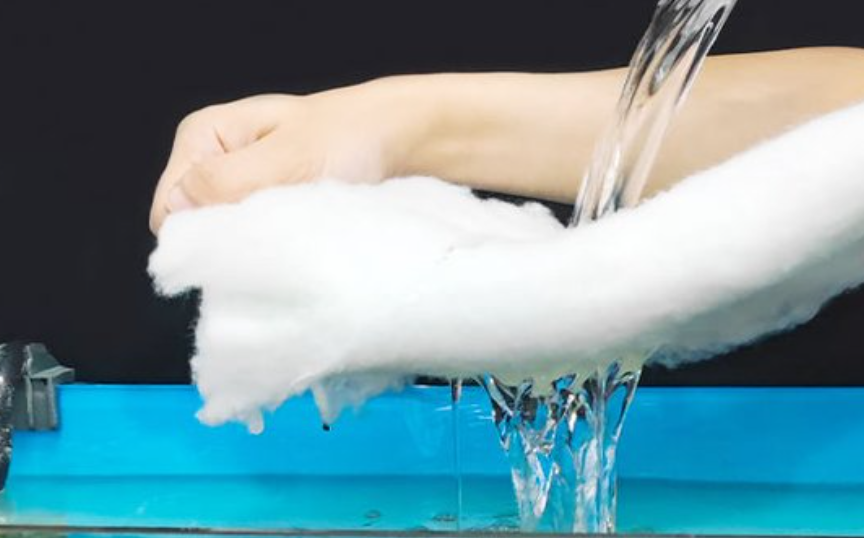
Lift the sponge straight up from the tank. Don’t squeeze it underwater. Squeezing releases trapped waste into your aquarium. All that gunk spreads through the water. Your fish will stress.
Pull the foam sleeve off the plastic intake tube. Some models use clips or tabs. Others slide off with ease. Handle the sponge with care. Rough treatment tears the foam. It destroys the pore structure where bacteria live.
The Proper Rinsing Technique
Dunk the sponge into your bucket of tank water. Squeeze it 3-5 times using moderate pressure. You’ll see brown, murky water pour out. This is normal. That color comes from waste, not bacteria.
The bacteria cling to the sponge material itself. They form sticky biofilm layers that don’t rinse away with gentle squeezing. This coating keeps them anchored during cleaning.
Never scrub or wring the sponge. Twisting motion tears the foam cells. Hard scrubbing removes the beneficial biofilm along with the waste. Think of it like washing a delicate sweater, not scrubbing a dirty floor.
Swish the sponge around in the water. Let it float and bob. Squeeze again. Repeat until the water runs clear. This takes 4-6 squeeze cycles in most cases.
The sponge won’t look brand new. A light brown tint is perfect. That color shows healthy bacteria are present. Trying to make it pristine white means you’ve cleaned too hard.
What to Do if the Water Stays Dark
Move to your second container of clean tank water if the first bucket gets too dirty. Very clogged sponges need a second rinse to remove stubborn debris.
Some fishkeepers split the cleaning process. Clean half the sponge at one session. Clean the other half two weeks later. This method keeps you from removing too much bacteria at once. Your filtration stays strong.
Reassemble and Restart
Slide the clean sponge back onto the intake tube. Make sure it fits tight. Gaps between the sponge and tube let debris bypass the filter.
Place everything back in its original tank position. Turn the air pump back on right away. Your beneficial bacteria need oxygen to survive. Leaving them without airflow for more than 15-20 minutes kills colonies.
Watch the bubbles for a minute. Flow should look normal or even a bit stronger than before cleaning. Weak flow after cleaning means you didn’t remove enough debris. You might need a deeper clean next time.
Critical Timing Rules
Complete the entire cleaning process in under 15 minutes. Speed matters. Bacteria start dying once removed from their oxygen-rich home. Every extra minute out of the tank reduces their survival rate.
Never clean your sponge filter on the same day as major tank maintenance. Cleaning your substrate, changing decorations, or treating diseases already stresses your system. Adding filter cleaning on top crashes your cycle.
Plan sponge cleanings during regular partial water changes. You already have buckets of tank water ready. The process fits into your routine.
Know When to Clean vs When to Replace
Sponge filters don’t last forever. The foam breaks down over time, even with perfect care. Pores collapse. Structure weakens. Bacteria can’t grow on damaged foam.
Watch for these replacement signals. They tell you cleaning won’t help anymore.
Physical Damage Signs
Torn or ripped foam? Replace it now. Small tears get bigger each time you clean. Water flows through the rips, not the pores. Debris passes straight through. Your good bacteria lose their home.
Check for compression damage. Squeeze a dry sponge section. Does it bounce back to full thickness? Healthy foam rebounds in 2-3 seconds. Foam that stays compressed has a broken cell structure. Cleaning can’t fix this.
Texture changes mean the end. Run your fingers across the surface. Fresh sponge foam feels soft with even resistance. Bad foam feels:
– Brittle or crispy in spots
– Slimy even after thorough rinsing
– Mushy with no structure
– Hard patches mixed with soft areas
Performance Problems Cleaning Can’t Fix
Flow drops back within 3-5 days after cleaning? Your sponge has reached its limit. The foam pores have shrunk for good from mineral buildup or bacteria deposits.
Run these tests after your next cleaning:
– Measure bubble flow rate with a timer
– Check water clarity after 24 hours
– Test ammonia and nitrite levels at 48 hours
Still seeing problems? Stop wasting time on cleanings. The foam material has failed.
The 6-Month Baseline Rule
Quality sponge filters last 6-12 months with proper care. Cheaper foam breaks down in 3-6 months. Premium models can reach 18-24 months in low-stock tanks.
Mark your install date. After 6 months, watch for decline. Replace at 12 months no matter how it looks. The tiny foam structure breaks down even when the outside seems fine.
Running budget tanks with heavy fish loads? Plan for replacement every 4-6 months. Constant waste breaks down foam faster. Your regular cleaning costs less than fixing a crashed cycle from filter failure.
Cut Down Your Sponge Filter Cleaning Work
Take these simple steps to cut your tank work in half. Focus on stopping waste before it hits the sponge filter. Your filter runs longer between cleanings. Water stays clean.
Add Pre-Filter Protection
Put a coarse pre-filter over your sponge intake. This mesh sleeve catches big debris first. Food bits, plant pieces, and fish waste get stuck in the outer layer. Rinse this pre-filter once a week. Takes seconds. Your main sponge stays cleaner for weeks.
Pre-filter sleeves cost $3-8. They fit most standard sponge filters. Cleaning intervals extend by 30-40% in tanks with debris. Breeding tanks get big benefits. So do planted setups.
Control How Much You Feed
Feed what fish eat in 2 minutes. Set a timer. Watch them eat. Stop when they slow down. This beats every other trick for preventing clogs.
Extra food causes problems fast. It breaks into tiny bits. These sink deep into sponge pores. Overfeed for one week? You’ll clog a filter that usually runs clean for a month.
Switch to sinking pellets for bottom feeders. Flakes float around the tank. They drift in the current. Many pieces don’t get eaten. They end up stuck in your filter.
Use feeding rings to keep food in one spot. Fish learn to eat there. Less food spreads. Less waste hits your sponge filter.
Add Extra Filtration
Run two sponge filters in larger tanks. Split the work across both units. Each handles half the waste. Both last twice as long before cleaning.
Put filters at opposite tank ends. Better water flow. Debris gets cleaned before it settles in dead zones.
Canister filter pre-filters help in high-waste tanks. They catch bulk waste first. Clean the canister once a week. Your sponge filter coasts for months with little buildup.
Better Tank Care Habits
Vacuum your substrate once a week. Get waste before it dissolves. Less dissolved waste means easier filter work. Focus on spots under decorations where debris piles up.
Pull dead plant material right away. Dying leaves rot fast. They spike ammonia and clog filters with plant bits. Trim brown or damaged leaves the same day you see them.
Stick to your water change schedule. Do 20-30% changes each week. This removes dissolved organics. Your filter handles less total waste. The sponge stays cleaner.
Common Mistakes That Lead to Over-Cleaning or Under-Cleaning
Fishkeepers ruin their filters in two ways. Both lead to sick fish and emergency water changes.
Cleaning Too Often Wipes Out Your Bacteria
Touch your sponge filter every few days? You kill the good bacteria. New tank owners panic at brown buildup. They rinse the sponge twice per week. They think cleaner equals better. Wrong.
Good bacteria need 2-3 weeks to rebuild after each cleaning. Clean every 4-5 days? The colonies never grow strong. Ammonia spikes keep happening. Fish stay stressed.
Tap water during cleaning destroys everything. City water has chlorine and chloramine. These kill bacteria on contact. Dechlorinated tap water causes problems too. Temperature shock harms bacterial cells. pH differences stress the colonies.
Some fishkeepers scrub their sponges until they look brand new. This removes the biofilm layer. Most bacteria live there. That brown coating isn’t dirt. It’s millions of tiny workers keeping your water safe.
Waiting Too Long Creates Bigger Problems
Ignore a clogged filter? Your cycle crashes fast. Water flow drops to almost nothing. Your bacteria can’t get oxygen. They die within 48-72 hours without proper water movement.
Dead zones form inside the sponge. Waste piles up in layers. Bad bacteria take over. They make hydrogen sulfide. That rotten egg smell signals serious trouble.
Miss the warning signs? You lose weeks of recovery time. Weak bubble flow, cloudy water, and fish gasping at the surface all need quick action. Wait a few more days? Your biological filter fails completely.
“Set it and forget it” tank owners face ammonia spikes. Testing shows 2-4 ppm ammonia in tanks. The sponge hasn’t been cleaned for months. Fish get chemical burns on their gills.
Not Matching Cleaning to Your Tank Type
The same schedule for every tank? That fails. A breeding tank with 50 fry needs attention each week. Your planted shrimp tank runs fine for 8-10 weeks between cleanings. Treat them the same? One crashes. The other gets cleaned too much.
Goldfish and cichlids eat a lot. They clog filters three times faster than tetras or rasboras. Ignore your specific bioload? You’re either cleaning too much or not enough.
Conclusion
Sponge filter care is simple. Most tanks need cleaning every 2-4 weeks. Your exact schedule depends on fish count, feeding amounts, and tank setup. Planted tanks differ from bare-bottom ones.
Here’s the key rule: Clean the filter when water flow drops or you see debris building up. Don’t just follow a calendar.
Your sponge filter holds millions of good bacteria. These bacteria keep your fish healthy. Use old tank water for cleaning to protect this bacteria. Gentle squeezing works best. Harsh scrubbing or tap water kills the bacteria fast. This can crash your tank’s cycle overnight. Check your filter often. Know how many fish you have. Let the filter’s performance tell you when to clean, not worry.
Want to improve your routine? Track your filter’s flow rate starting today. Note when it drops by 30%. That’s your cleaning signal. Clean fish show bright colors and stay active. A balanced tank takes care of itself once you get this right. Get this part down, and you’ve solved half the work of keeping clear, healthy water.