Check your filter replacement box. You’ll see the bold claim: “Replace every 4 weeks.” It sounds simple. But manufacturers often miss a key detail. Replacing filter media on a strict schedule can hurt your tank. This destroys beneficial bacteria and hurts your wallet too.
We see this often. An aquarist throws out an old, brown sponge. Days later, they wake up to cloudy water and stressed fish. Why? They treated a biological treasure like a napkin. Know the difference. Mechanical floss polishes water. But that seasoned biological sponge acts as the life support system for your aquarium.
So, when do you switch? The calendar doesn’t tell the whole story. This guide goes beyond “one size fits all” advice. You will learn to read physical signs of foam wear. We explain your bioload’s specific demands. Plus, you’ll learn to spot the difference between “dirty” foam that needs a rinse and “dead” foam that needs to go.
Replacement Frequency (Every 4-6 Weeks General Guideline)
Most aquarium filter foam follows a 4-6 week replacement cycle as the industry-standard starting point. This timeline applies to mechanical filtration foam, not biological media. The actual interval varies based on your tank’s specific conditions.
Mechanical Filter Foam vs. Biological Filter Media: Different Replacement Standards
Mechanical filtration foam (white floss or fine filter pads) in canister filters or hang-on-back (HOB) units needs complete replacement every 4-6 weeks. This assumes you rinse the foam weekly or every two weeks using old tank water to maintain adequate water flow. The 4-6 week guideline comes from manufacturer recommendations for average home aquariums.
High bioload tanks require more frequent changes. Keep many fish or large species? Replace mechanical foam every 2-4 weeks. Light stocking with planted tanks and minimal fish? You can extend this to 6-8 weeks, provided water flow remains strong and output stays clear.
Biological filtration media operates on a different schedule. These high-surface-area sponges colonize beneficial bacteria. Never replace them fully on a 4-6 week cycle. Replace just 25-50% of the biological foam every 6-12 months. Wait at least 4-6 weeks between partial changes.
Must replace an entire biological sponge due to severe deterioration? Run the new foam alongside the old one for 4-6 weeks first. This lets beneficial bacteria colonize on the new media. Then remove the old foam over the following 4-6 weeks.
Bioload and Tank Size: Quantified Impact on Replacement Frequency
Fish density affects foam lifespan. The traditional guideline suggests 1 cm of small fish per liter of water (or 1 inch per gallon). At this density, mechanical foam maintains the standard 4-6 week cycle. Exceed this density—reaching 1.5-2 cm per liter—and you’ll need to replace foam every 2-4 weeks to prevent flow restriction.
Large fish change the equation. A single 20 cm goldfish produces waste equivalent to 8-10 small 5 cm fish. Keep large cichlids, goldfish, or catfish? Cut your mechanical foam replacement interval in half—from 4-6 weeks down to 2-3 weeks.
Filter volume ratio matters too. Your biological media volume should equal 5-10% of tank volume (for example, 10-20 liters of media in a 200-liter tank). The 4-6 week mechanical foam schedule works well at normal stocking densities. Both ammonia and nitrite stay at zero throughout this period.
Undersized filtration (media volume below 3% of tank volume) combined with high fish density forces more frequent changes. Replace mechanical foam every 2-4 weeks. Plus, increase water changes to 25-50% weekly to compensate for reduced biological capacity.
Real-Time Indicators Override Fixed Schedules
Don’t just follow the 4-6 week timeline. Replace mechanical foam right away if water flow drops 30-50%. Canister pressure rises? HOB water level increases? Even if just 3-4 weeks have passed, change the foam.
Monitor water parameters at the cycle endpoint. Ammonia and nitrite remain at zero during normal feeding? Nitrate increases less than 20-30 mg/L weekly after 4-6 weeks? Your current replacement schedule works. Adjust frequency based on these measured results rather than fixed dates.
Cleaning vs. Replacement Decision
Rinse your foam when water flow weakens but the material holds its shape. Replace it when the structure breaks down or cleaning no longer restores flow. Know the difference between good maintenance and wasted time.
Physical Condition Check: The Main Decision Factor
Structure tells you if cleaning will work. Squeeze the foam between your fingers. Good foam springs back to its original shape within 2-3 seconds. Foam that stays compressed or crumbles under light pressure is done. The cell structure has collapsed. Rinsing won’t fix this.
Check for material breakdown during routine care. Pull the foam from opposite edges. Does it stretch without tearing? Good. Does it rip or show thin spots? Time for replacement. Mechanical filter foam shows these signs after 4-6 months of regular cleaning, even with proper care.
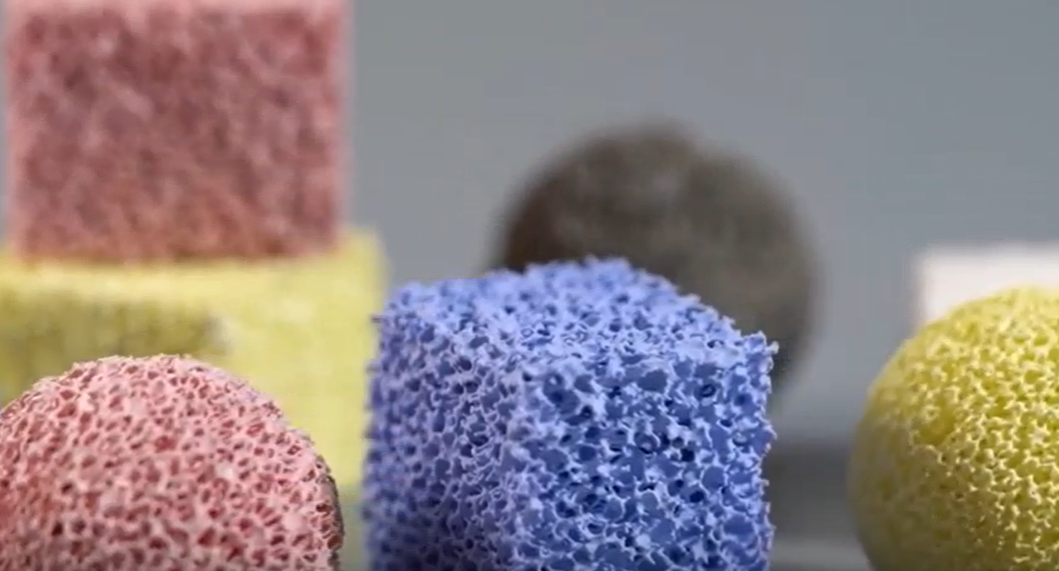
Color changes give you more clues. Fresh foam appears white or light blue. Normal use turns it tan or light brown from tannins. This is fine. Dark brown or black color means deep organic matter has gotten inside. Rinse a dark foam three times with tank water. Still dark? The pores are clogged for good. Replace it.
Flow Restoration Test: Measured Performance
Run this simple test after cleaning. Rinse the foam in old tank water until runoff looks clear. Put it back. Measure flow rate at the output. Flow should recover to 80-90% of the rate with brand-new foam. Use a measuring cup and timer. Count how many liters (or gallons) discharge in 30 seconds.
Compare this to your baseline from the last foam replacement. Flow recovers to 60-70% of baseline after cleaning? The foam has lost too much surface area. Clogging happens faster each cycle. Replace within the next 1-2 weeks.
For canister filters, watch pressure gauge readings. Clean foam should bring pressure down to within 10-15% of the reading with new media. Pressure stays high? Internal pore structure has compressed for good.
Cleaning Frequency as a Replacement Sign
Track how often you rinse each piece of foam. Mechanical pre-filter foam needs rinsing every 7-14 days at first. Notice you’re cleaning the same foam every 3-5 days to maintain flow? This faster maintenance cycle means replacement time is coming.
Biological filter foam works in a different way. Rinse it when flow drops a lot. This happens every 4-8 weeks. Gentle rinsing in tank water keeps the biofilm on filter foam while removing loose debris. Never scrub biological media hard. The brown coating contains your helpful bacteria. Hard cleaning strips this protective layer. This forces the nitrogen cycle to restart.
Cost-Benefit Check for Borderline Cases
Compare replacement value versus cleaning effort. Standard mechanical foam costs $3-8 per sheet. Spending 15-20 minutes cleaning foam that improves flow very little? Your time costs more than replacement. Biological media costs $15-40 but lasts 1-2 years with proper care. Always worth cleaning unless damaged.
Signs Your Foam Needs Replacement
Check your foam visually first. Hold it up to light. Fresh foam lets light pass through evenly across the entire surface. Aged foam shows dark patches where light can’t get through. These areas have permanent clogs that cleaning won’t fix.
Water Quality Changes Show Foam Failure
Ammonia spikes often mean biological foam problems. Test your water each week during the 4-6 week cycle. Ammonia stays at zero with healthy biofilm on filter foam. You detect 0.25-0.5 mg/L ammonia despite feeding the same amount? Your biological foam has lost bacterial colonies. Foam breaks down and bacteria lose their living space.
Nitrite readings work the same way. Levels should stay undetectable in established tanks. Finding 0.5-1.0 mg/L nitrite? Check your biological filtration media right away. Foam breaks down partially. This cuts surface area for bacteria. Gaps appear in the nitrogen cycle.
Nitrate buildup speeds up with failing mechanical foam. Track nitrate each week. Normal increase runs 10-20 mg/L per week in medium-stocked tanks. Jumps to 30-50 mg/L per week? Your mechanical filtration foam isn’t catching solid waste well. Particles bypass clogged filter foam. They break down in the tank instead.
Visible Breakdown Patterns
Foam density changes over time. Press new foam—it feels firm and elastic. Bad foam feels mushy or brittle. Coarse foam (30 ppi) shows bigger holes. Fine foam (60 ppi) gets tears along edges. Both mean structural failure. Time to replace.
Surface texture matters for filter media. Run your fingers across the foam. Smooth, slippery film? That’s healthy biofilm. Rough, scratchy texture with debris stuck in it? The foam can’t release trapped particles anymore. Three rinses don’t make it smooth again? Replace it.
Odor test finds hidden problems. Healthy biological media smells earthy, like damp soil. Sharp ammonia smell? Pockets without oxygen formed inside bad foam zones. Rotten egg smell? Sulfur bacteria moved into dead areas. Both cases need foam replacement right away. This stops water flow problems and tank ecosystem failure.
Replacement Process Steps
Pull the plug before you touch anything. Don’t rush into foam replacement without shutting down first. This causes spills, equipment damage, and kills your bacteria. Follow these steps in order. You’ll protect your filter system and keep beneficial bacteria alive.
Step 1: Shut Down and Isolate the Filter
Unplug the filter from the wall outlet. Don’t just flip the power strip switch—remove power at the source. Wait 60-90 seconds for the impeller to stop. You’ll hear the motor wind down. Water movement will cease.
Close both intake and output valves if your canister filter has them. Turn the intake valve first, then the output. This stops backflow from dumping debris into your clean tank. No valves on your HOB filter? Lift the intake tube above water level. Pinch it closed with a clip.
Step 2: Remove Old Foam in Controlled Environment
Move your filter to a sink or large basin. Canister filters hold 2-4 liters of water inside. Opening them over carpet or wood floors creates a mess. Press the pressure release button (on top) before unlatching the canister lid. This stops water from spraying out.
Take photos of your current media setup before removing anything. Capture the order of foam layers, bio media, and water flow direction. Pull out filter baskets one at a time. Note which basket held coarse pre-filter foam. Check which had fine polishing pads. Installing these backwards drops efficiency by 40-60%.
Step 3: Clean Hardware With Tank Water
Rinse empty filter baskets, impeller housing, and lid seals. Use water from your aquarium. Never use tap water on parts that touch bio media. Chlorine kills beneficial bacteria even after you install new foam.
Scrub the impeller shaft and magnetic coupling with an old toothbrush. Remove brown slime from these parts. Buildup here cuts flow rate and increases noise. Check O-rings for cracks. Replace any that feel brittle or show flat spots.
Step 4: Install New and Old Foam Together
Replace 25-33% of bio media volume per session. Keep 67-75% of old foam running with new material. This keeps bacterial colonies alive. The new foam will develop its own biofilm.
Cut new mechanical foam 5-10% larger than the basket size. Press it into place so edges touch the walls without gaps. Water takes the easiest path. Loose foam lets debris bypass the filter.
Position coarse foam (20-30 ppi) in the first stage where water enters. Place fine foam (45-60 ppi) in the final polishing stage. This layered setup extends foam life. It also catches particles of different sizes better.
When NOT to Replace (Preservation Strategy)
Biological filter foam holds all your helpful bacteria. Replace it all at once? Your nitrogen cycle crashes. Ammonia spikes to dangerous levels. Keep this foam unless it’s badly damaged.
Brown Biofilm Means Healthy Function
That dark brown coating on your filter foam isn’t dirt. It’s a living bacterial colony. Never replace foam just because it looks discolored. The brown layer has millions of helpful bacteria that break down fish waste. Clean mechanical foam as it turns dark. Keep biological media with its brown coating untouched.
Test your water before you decide anything. Ammonia reads zero? Nitrite reads zero? Nitrate goes up 10-20 mg/L each week? Your biological foam works great despite looking brown. The foam pores still give bacteria plenty of space to grow. How it looks doesn’t tell you how it performs.
Reduced Flow Doesn’t Always Mean Replacement
Water flow drops during normal use. Rinse biological foam gently first before you think about replacing it. Squeeze the foam 3-4 times in a bucket of old tank water. This pulls out loose debris. The protective coating stays on.
Flow comes back to 70-80% after cleaning? Keep using that foam. The bacteria colonies stay stable. Bacteria need 4-6 weeks to fully colonize the foam. Tossing working foam throws away all this biology. Your tank goes through a mini-cycle.
Watch how water flow changes. Slow decline over 6-8 weeks? That’s normal clogging. Clean the foam. Flow drops 50%+ in 1-2 weeks? You’ve got damage or major debris buildup. Check for torn foam. Look for large bits stuck in the pores. Then decide if you need to replace it.
Preserve During Equipment Upgrades
Upgrading to a larger filter? Transfer 50-75% of old biological foam to the new system. Cut pieces to fit new baskets. Run both filters together for 2-3 weeks if you can. This gives the new filter bacteria from your old setup. Water stays stable.
Don’t toss all old foam just because you’re changing filter brands. The bacteria you’ve grown took months to develop. Save them whenever you can during equipment changes.
Trust Your Eyes, Not Just the Calendar
Forget the strict 30-day rule printed on the box. A healthy aquarium needs observation, not a rigid schedule. You understand that mechanical foam and biological media serve different roles. Treat white pads as disposable wipers. But guard those brown, dirty sponges. They act as vital assets for your tank’s health.
Wait for physical signs of wear. Look for a failed squeeze test or a drop in water flow. This strategy saves you money every month. It also prevents dangerous stability swings. Tossing old media destroys your tank’s immune system. Rely on the tests we discussed. Does the foam spring back? Is the flow strong? Then let it ride.
Fish do not care about brand new, sparkling white filter media. They want stable, toxin-free water. Pause before you reach for the trash can. Take another look. Rinse the sponge in old tank water. Often, that simple step keeps your system running smooth.