Every shrinkage defect that reaches your customer starts with the same problem — the wrong riser, or no riser at all. Most foundries treat riser selection as an afterthought. Teams pick by gut feel and habit, not by geometry and physics. That’s a costly mistake.
The top 10 risers for Sand casting cover a wide range. You’ll find basic cylindrical standbys on one end. On the other, exothermic sleeves that fight solidification as the metal cools. Picking the right one can push your yield from 60% to 85%.
This guide breaks down each riser type by three things:
-
How it works
-
Where it performs best
-
Where it falls short
Match the right riser to your application before the metal hits the mold.
What Is a Riser in Sand Casting (Why It Matters)
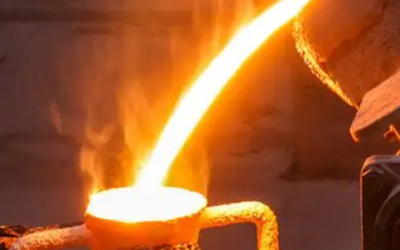
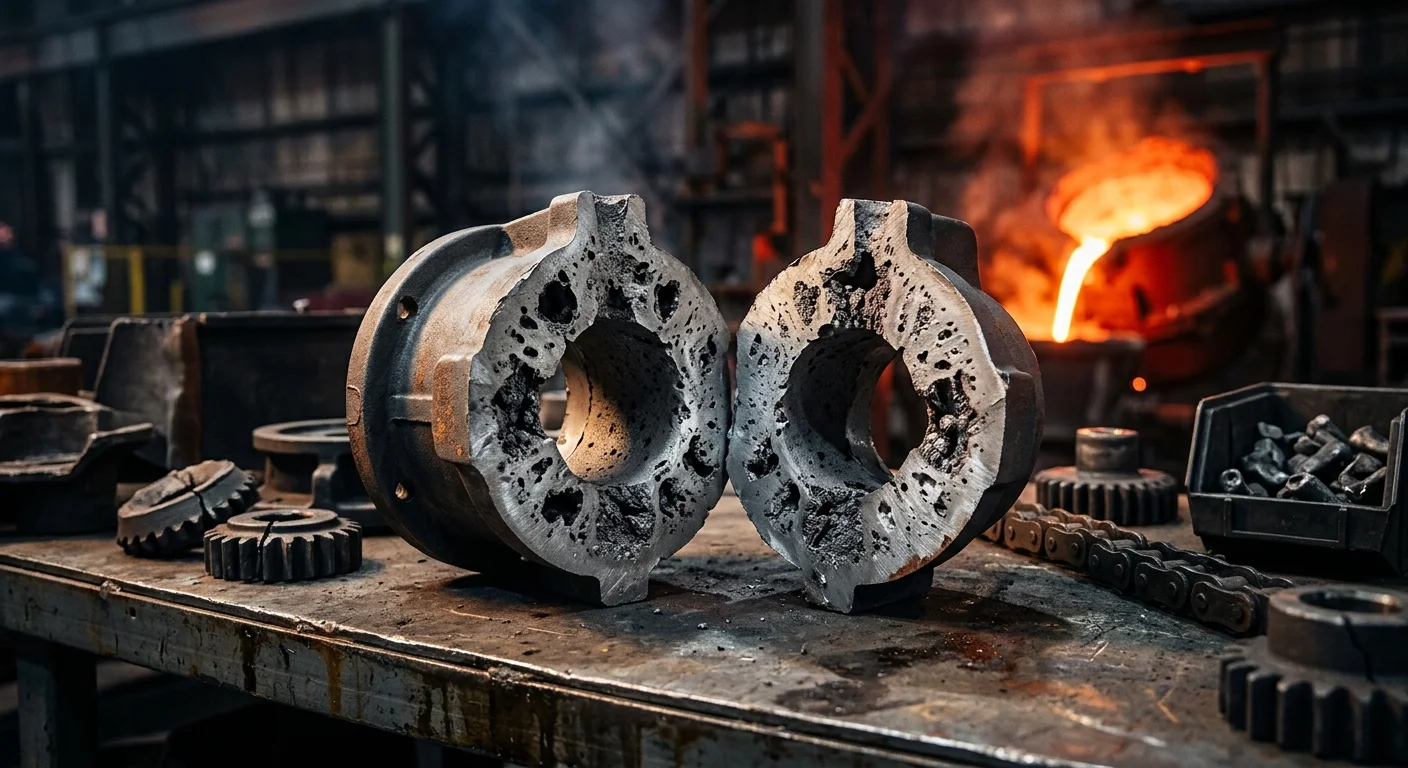
Metal shrinks as it solidifies. That’s not an opinion — it’s physics. Most metals contract between 2% and 7% by volume during the liquid-to-solid transition. Without something feeding that shrinkage, the void has to go somewhere. It goes straight into your casting.
A riser solves this. It’s a reservoir of molten metal built into the mold. Its job is to feed the casting as it solidifies. The cavity forms in the riser — not in the part your customer receives.
Get it wrong, and scrap rates climb to 15–40%. Get it right, and you’re looking at yield improvements of 5–15% with defect rates under 5%.
The core principle here is Chvorinov’s Rule. The riser must solidify after the casting — not before, not at the same time. To make that happen, the riser’s volume-to-surface-area ratio must be larger than the casting’s. A larger ratio means slower cooling. Slower cooling means the riser stays liquid long enough to keep feeding the part.
One number guides the best riser shape — a height-to-diameter ratio of 1:1 to 1.2:1. Cylindrical risers hit this ratio with no special adjustments. That’s the main reason they show up on foundry floors across the world.
Cylindrical Risers — The Industry Standard Baseline
Walk into almost any foundry on earth and you’ll find the same shape sitting atop the mold — a cylinder.
Not because foundry engineers lack imagination. Cylinders simply work. The geometry is straightforward. A height-to-diameter ratio of 1:1 to 1.2:1 gives you the highest volume-to-surface-area ratio of any shape you can pack into a sand mold. No exotic tooling needed. That ratio matters more than anything else. A riser needs to stay liquid long enough to feed the casting. Miss that window, and you get a shrinkage pipe buried inside your part.
Where cylindrical risers perform best:
-
Thick-section ferrous castings — gray iron, ductile iron, carbon steel
-
Medium-complexity geometries with a single dominant hot spot
-
High-volume production runs where tooling consistency matters
The limitation is real, though. Thin-walled sections cool faster than a cylinder can keep up with. Irregular geometries with multiple hot spots spread the feeding demand across the mold. A single cylinder can’t cover all of that.
For standard block and bracket castings, nothing beats the cylinder. You get simplicity, reliability, and solid yield — all in one shape.
Spherical Risers
Physics doesn’t negotiate. A sphere holds the lowest surface area per unit volume of any 3D shape. That one geometric fact is what makes spherical risers stand apart.
Less surface contact with the mold means less heat escapes. Less heat loss means the metal stays liquid longer. And longer liquid availability means the riser keeps feeding the casting deeper into solidification — right when shrinkage pressure hits hardest.
The numbers from controlled trials back this up:
-
+7% longer feeding time vs. cylindrical risers in aluminum alloy A319 castings
-
45% yield improvement across three alloys — nickel aluminum bronze, low-carbon steel A216 WCB, and aluminum A319
-
−47.27% reduction in entrained air volume fraction during filling and solidification
-
−32% to −77% reduction in riser neck diameter — far less metal locked up in the neck zone
-
+18% improvement in riser-pipe safety height — fewer piping defects reaching the part
-
Flexural testing confirmed measurable gains in mechanical strength in finished castings
That’s not a small step forward. That’s a completely different level of performance.
There’s one hard constraint. Traditional sand molding can’t produce a true sphere. Parting lines and draft angles make it impossible with standard tooling. Spherical risers need 3D sand printing (binder jetting) to work — riser cores print as separate pieces, then go into conventional molds. No pattern tooling needed. Geometry changes happen at the file level, not the machine shop.
Foundries with access to binder jetting equipment get the best feeding efficiency of any passive riser geometry in the top 10 risers for sand casting. For everyone else, the cylinder holds its ground — until the equipment situation changes.
Top Risers (Open) — Visibility, Venting, and Slower Solidification in One
Open Top risers do something the others can’t — they let you watch.
The open top riser sits above the casting cavity, at the highest point in the mold. Gravity works in its favor. It fills last. It solidifies last. That sequence is no accident — it’s the whole mechanism. Shrinkage voids form in the riser, not in the part.
The open design gives you two practical advantages that closed risers don’t:
-
Atmospheric venting — air escapes as metal rises. No pressure buildup. No skins. No blocked feed flow.
-
Visual confirmation — operators on the shop floor can see the metal level, stir if needed, or add exothermic material for large pours.
That visibility matters more than most engineers give it credit for.
Where open top risers earn their place:
-
Large, heavy steel castings with a single dominant hot spot
-
Applications where topping up or exothermic additions are part of the process
-
Molds without flask height restrictions — riser sleeves handle the rest
The trade-off is feeding efficiency. Open tops run lower than blind risers. Heat escapes from the exposed surface. But for large steel castings, that’s an acceptable cost. The atmospheric assist and real-time observation make up for it — and then some.
|
Type |
Feeding Efficiency |
Flask Impact |
Best Application |
|---|---|---|---|
|
Open Top |
Lower |
No height limit |
Large steel castings |
|
Blind |
Higher |
Taller flask required |
Medium/small iron castings |
One rule governs placement: put the riser above the thickest, hottest section. Each hot spot at a different level needs its own riser. Chills bridge the gaps between them.
Side Risers
Some castings won’t cooperate with a top riser. The geometry blocks it. The parting line won’t allow it. Flask height runs out. The mold design forces your hand — so the side riser steps in.
Side risers attach to the casting at the parting line. They sit at the side, not above. That fixes the access problem. Multi-cavity molds work. Tall or irregular shapes work. Parts with critical top surfaces that can’t take a riser scar — those work too.
The trade-off is thermal. Side risers sit at the same level as the casting, not above it. Gravity doesn’t pull metal downward to feed the part. Heat escapes faster through the connected sand mass. Feeding efficiency drops compared to a well-placed top riser.
Two tools offset that thermal disadvantage:
-
Insulating sleeves — slow the riser’s cooling rate, stretching out the feed window
-
Exothermic sleeves — generate heat on their own, keeping the riser liquid deeper into solidification
Skip either one on steel or heavy iron sections and you’re taking on unnecessary scrap risk. Use both and they pay for themselves.
Side risers perform best when:
-
Part geometry or parting line placement blocks top riser access
-
Surface quality on the top face is a hard requirement
-
Multiple feed points along a horizontal section are needed
Constrained geometry is a genuine challenge in production casting. Side risers handle it — no full mold redesign needed.
Open Risers
Atmospheric pressure is free. Open risers put it to work.
Strip it down to basics: an open riser is a riser with no lid. The top surface stays exposed to the atmosphere. That exposure isn’t a design flaw — it’s the whole point.
Here’s what solidification looks like. Metal contracts inside the casting. It tries to pull a vacuum. A closed system pushes back with whatever metallostatic pressure it has left. An open riser doesn’t push back at all. Atmospheric pressure bears down on the exposed metal surface — 14.7 psi at sea level — and drives feed metal straight into the shrinking cavity. The flow stays steady the entire time.
No pressure buildup. No blocked flow. No feed interruption.
Open risers work best for:
-
Non-ferrous alloys — aluminum and copper-based castings take well to atmospheric-assist feeding
-
Shallow, wide castings where gravity and pressure combine to cover the full feed zone
-
Setups where easy riser access during pouring saves time on the floor
There is one trade-off. The open top loses heat fast. That speeds up solidification. For thin sections or long feed distances, it becomes a real problem. Add an exothermic topping compound and you get most of that heat back. The compound burns, slows the surface skin, and keeps the feed window open longer.
The design stays simple. The physics holds up. Plus, open risers need no special tooling changes to drop into an existing mold.
Blind Risers
Seal the top. Keep the heat. Feed the casting from the inside out.
That’s the blind riser in one sentence — and the geometry is exactly what earns it a spot on this list. Spherical and dome blind risers cut metal weight by up to 30% compared to cylindrical shapes. Not through magic. Through thermal physics. A closed riser holds heat longer than an open one. That slower heat loss lets a smaller riser do the same feeding job. Less metal in the riser means more metal ends up in the part.
The size range covers serious production ground:
-
Spherical: 1.5″ to 24″ inside diameter
-
Dome: 0.75″ to 14″ inside diameter
Spherical designs carry two built-in advantages that shift the numbers in your favor. First — firecracker cores. They balance internal pressure without exposing the riser to the atmosphere. The riser stays sealed. No debris gets into the cavity once it closes. Second — 50% reduced contacts. Less interface area between the riser and casting means cleaner separation. You also get lower cleaning room labor as a result.
Dome geometry holds its own in high-pressure molding environments. The curved profile takes compressive stress better than flat-topped alternatives. That’s a structural advantage, not just a thermal one.
The performance ceiling is worth a look. Pair a blind riser with an exothermic sleeve and feeding efficiency reaches 75% of riser volume delivered to the casting — well above what standard designs deliver. Trial data puts exothermic blind riser yield rates at 70–74%.
The cost case is straightforward:
-
Lower melting costs — smaller risers mean less total metal poured
-
Reduced riser removal hours after shakeout
-
Lower energy costs across large carbon and low alloy steel production runs
Got contamination risk from atmospheric exposure? Or flask height that rules out a taller open riser? The blind spherical or dome design gives you real yield gains — no trade-offs needed.
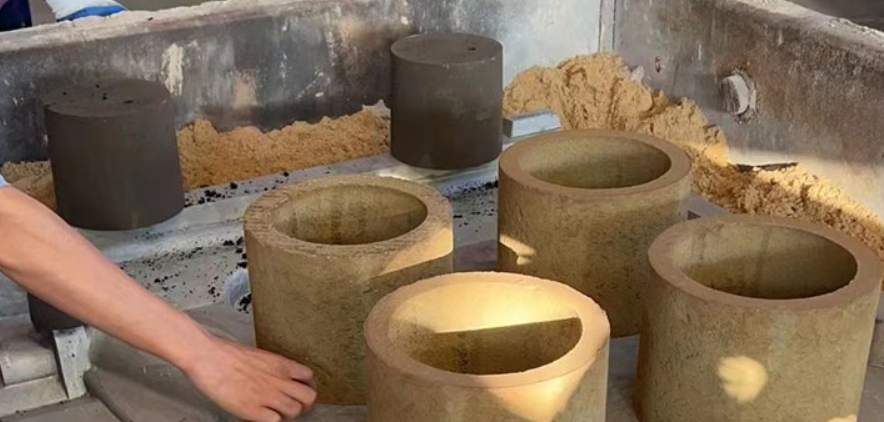
Insulating Riser Sleeves — Thermal Management Without Contamination
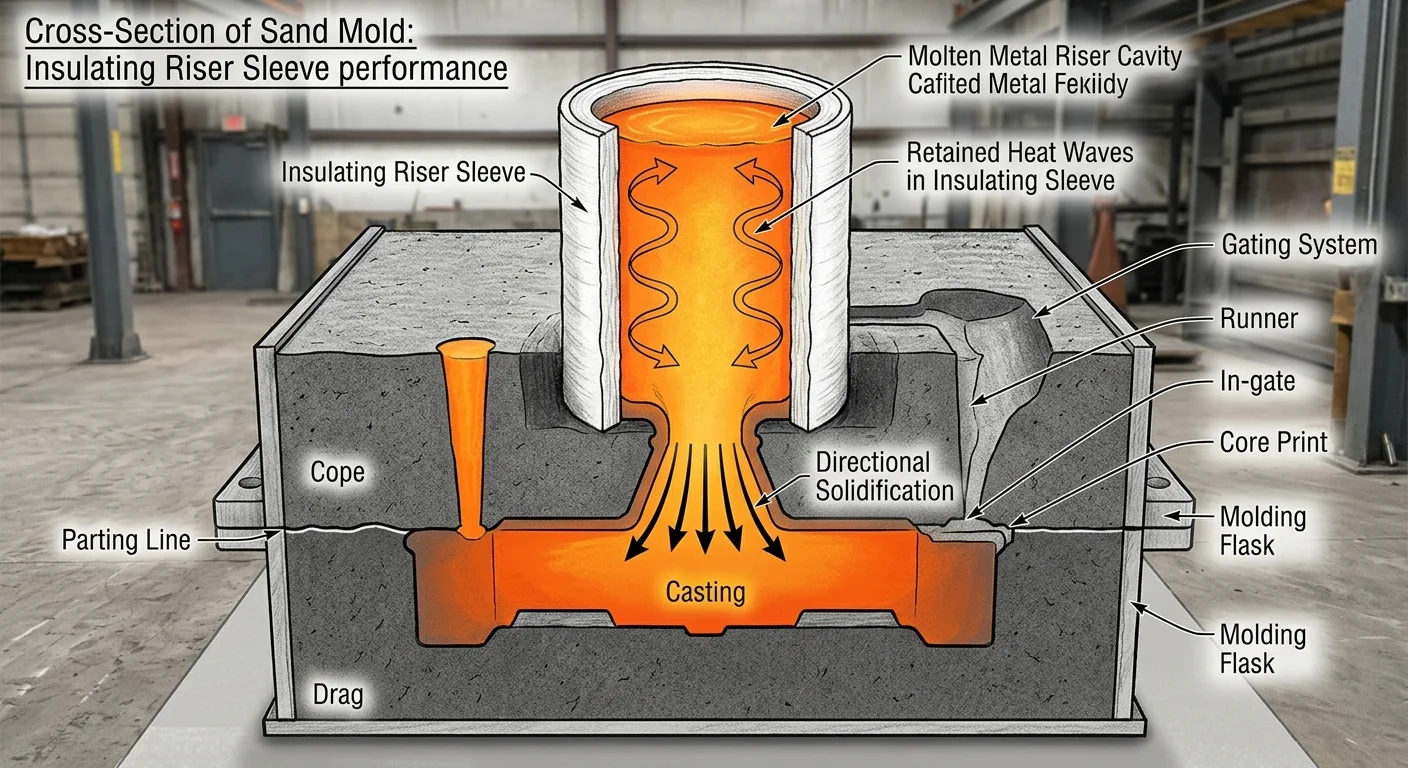
Heat loss is the enemy. The insulating riser sleeves fights it head-on — no added metal, no contamination, no disruption to your sand system.
The idea is simple. A low thermal conductivity material wraps around the riser cavity. Heat escapes slower. The metal inside stays liquid longer. That longer feed window lets you run a smaller riser head than a sand riser requires — and still hit the same solidification performance.
What the Insulating Riser Sleeves delivers:
-
No sand system contamination — resin-bonded and starch-bonded (W) formulations keep the system clean
-
No metal penetration — the sleeve holds its integrity under molding forces
-
Minimum gas and smoke — this matters in iron and ductile iron foundries, where fluorine contamination causes surface defects
-
Textured outer surface — locks into the sand, no shifting during pour
Size coverage runs 1″ to 30″ diameter, 6″ to 12″ lengths. The straight sleeve lineup covers standard production needs. You can also modify the geometry for special feeding requirements. Thermal performance stays intact.
The economic case is clean:
Smaller risers cut metal use by a typical 10–20%. Less metal poured means lower remelt volumes, lower melting energy costs, and less cleaning room labor after shakeout. Blind riser configurations add a 40% or 50% breaker core option, plus wedge-style firecracker cores. These reduce heat transfer at the contact point. That shrinks the riser neck and makes knockout easier.
For high-production ferrous and non-ferrous work that needs directional solidification, the insulating riser sleeve does one thing very well — it buys you time without making anything else harder.
Exothermic Riser Sleeves — Active Heat Addition for Maximum Feeding Time
Insulation buys time. Exothermic sleeves create it.
One slows heat loss. The other fights back — igniting an exothermic reaction that pumps heat straight into the riser cavity as the casting solidifies below. For high-shrinkage alloys like steel and high-alloy iron, that difference is real. It’s the gap between a clean casting and a scrapped one.
How the exothermic riser sleeves works:
Molten metal hits the sleeve. The exothermic mix ignites. Extreme heat builds from the top down — it extends peak temperature, cuts heat loss, and pushes feed metal back into the casting during the critical solidification window. The sleeve doesn’t just resist cooling. It delays it, hard.
What that delivers in practice:
-
Smaller riser sizes — same feeding performance, less metal poured
-
Reduced remelt volumes and lower melting costs
-
Easier riser knock-off — smaller contact area means less cleaning labor
-
Better casting yield across ferrous and non-ferrous applications
Size coverage is wide. Straight sleeves run 1″ to 42″ diameter, with standard heights to 12″. You also get neckdowns, blinds, domes, and spherical profiles.
For high-pressure green sand molding, SPOT Risers are worth a look. Available in standard or fluorine-free formulations, they give you high modulus and lower metal feed volume in one package.
Large section castings put serious pressure on Insulating sleeves. Some jobs need more than insulation — the feed window closes too fast. That’s exactly where the exothermic riser sleeves earns its place in the top 10 risers for sand casting.
How to Choose the Right Riser for Your Application
Nine riser types are sitting in front of you. Pick the wrong one and you lose 25–40% of your pour to shrinkage scrap. Here’s how to make the call with a clear, step-by-step method.
Five variables drive the decision. Weight them this way:
-
Section thickness (20%) — Above 50mm, go top-feeding. Under 20mm, blind risers do the job.
-
Geometry complexity (20%) — Single hot spot, simple shape: use cylindrical. Multiple sections with complex geometry: go with a 3D-printed ellipsoid or a custom core.
-
Yield priority (20%) — High-yield production needs a V/A ratio at least 1.2× the casting modulus. No exceptions.
-
Available molding technology (15%) — Traditional sand locks you into standard shapes. Binder jetting lets you use ellipsoids and spheres.
Score each variable from 1–10. Multiply by the weight. Add up the totals. The riser with the highest score wins.
A real example: Blind spherical scores 8.25. A 3D-printed ellipsoid hits 8.70. Open exothermic trails at 6.90. The numbers take the guesswork out.
Three mistakes that kill yield before the pour starts:
-
Riser V/A below casting V/A — shrinkage failure rate climbs to 25–40%
-
Blind risers without pressure equalization — pipe defects add up to 15% scrap
-
Exothermic sleeves on aluminum or magnesium — oxide reject rates jump 12%
Check one formula before every pour: V_riser / A_riser > V_casting / A_casting, with a minimum 1.2× modulus ratio. That one check cuts out the most common — and most costly — riser selection error in production casting.
Conclusion
The wrong riser doesn’t just waste metal. It wastes every hour your team spent designing, molding, and pouring — only to end up with a casting that shrinks, cracks, or fails inspection.
The right riser is never a guess. It’s a decision built on geometry, alloy behavior, and feeding distance. Across these top 10 risers for sand casting, there’s a purpose-engineered solution for almost every constraint you’ll face on the floor.
Three things to carry forward:
-
Yield is controllable. Blind risers and exothermic sleeves aren’t upgrades — they’re competitive advantages.
-
Shape drives efficiency. Spherical and ellipsoid designs outfeed cylindrical risers on physics alone.
-
Sleeve technology changes the math. Insulating and exothermic riser sleeves give you thermal control that open metal can’t match.
Take the decision framework from the previous section and put it to work on your next pour. Or reach out to FoundryMax — the best riser for your application already exists. You just need to find it.